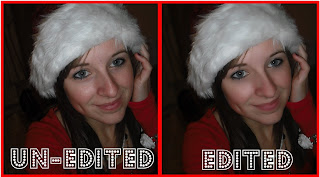
 Now with this tutorial I'm going to be using Photoshop CS3 but don't worry if you don't have this type of photoshop or you have a completely different photo editing program, you should still be able to apply the same step but the tools may be in different places. However this tutorial will not work for MS Paint, Paint.net or any other basic paint program - sorry!
First of you'll going to have to open up your photo in photoshop. My photo is one from Christmas but please just ignore this fact! Also, if you need to view the image larger just right click >> Properties >> copy and url >> paste in the address bar.
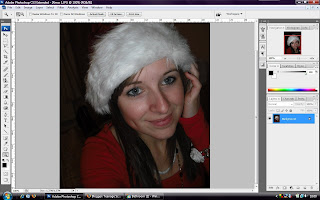
Next we are going to get the Healing Brush Tool which is the seventh icon down on the tools bar. If you cannot see this tool then right click on whichever tool is number 7 and it will appear in the dropdown menu.
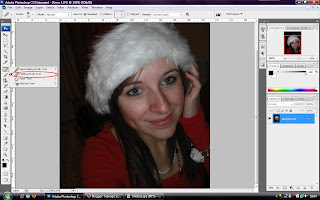
With this tool we are going to get rid of any shineyness, spots or blemishes. To do so, alt-click on a piece of skin that is close to the area you are going to edit but is blemish free and your natural skin tone. Once you have selected the skin, click onto the blemish to heal it. Keep in mind that your brush size should be big enough to just fit over the blemish or smaller.
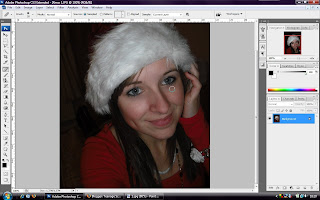
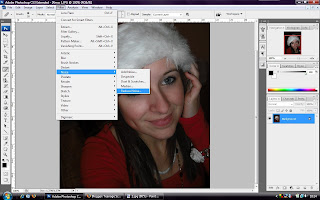
Once we have finished getting rid of any marks or "bad parts" on the skin, we can airbrush the image. For this step we have to reduse the noise of the photo. To reduse the noise go to: filter >> noise >> reduce noise. A pop-up box should then appear:
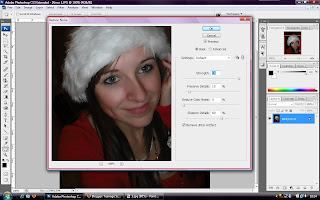
With this box open, I had my settings as the following:
Strength: 10
Preserve Details: 10%
Reduce Colour Noise: 0%
Sharpen Details: 69%
However, depending on the quality of your photo your settings may differ. Just mess around with the settings until you are happy.
To ultra-edit your photo you can also click on "Advanced" (show below) and change the settings per channel. For this photo I had all the advanced settings at:
Strength: 10
Preserve Details: 60%
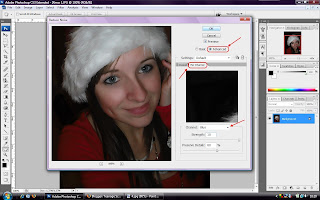
Once you have finished with the settings, click "OK". And voila! You've successfully airbrushed your photo!

If you feel confident enough you could also try adding things such as eyelashes etc. But these types of things (e.g. brushes) have to be downloaded.
Hope this helped! Happy Easter everyone.
No comments:
Post a Comment